shader入门基础-渐变纹理,遮罩纹理
shader入门基础-渐变纹理,遮罩纹理
本文内容主要参考 《Unity shader 入门精要》一书,旨在总结所学知识与加深个人理解
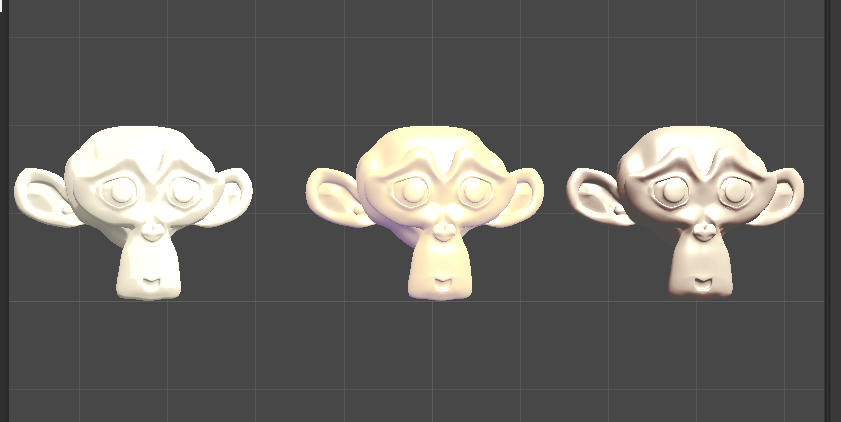
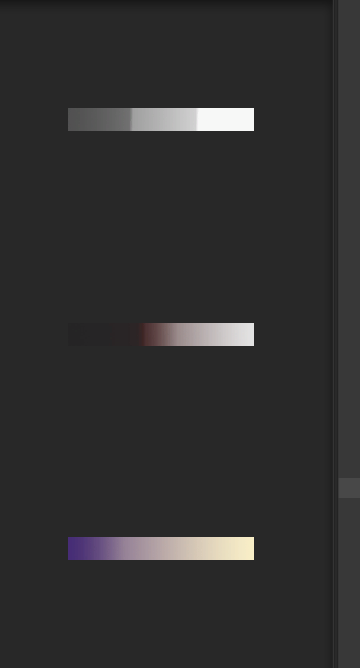
渐变纹理
学习如何使用渐变纹理来控制漫反射光照。
1
2
3
4
5
6
7
8
9
10
11
12
13
14
15
16
17
18
19
20
21
22
23
24
25
26
27
28
29
30
31
32
33
34
35
36
37
38
39
40
41
42
43
44
45
46
47
48
49
50
51
52
53
54
55
56
57
58
59
60
61
62
63
64
65
66
67
Shader "Practice/RampTex"
{
    Properties
    {
        _RampTex ("Texture", 2D) = "white" {}
        _Color("Color Tint",Color) =(1,1,1,1)
        _Specular ("Specular", Color) = (1, 1, 1, 1)
		_Gloss ("Gloss", Range(8.0, 256)) = 20
    }
    SubShader
    {
        Tags { "LightModel"="Forward" }

        Pass
        {
            CGPROGRAM
            #pragma vertex vert
            #pragma fragment frag
            #include "Lighting.cginc"
            fixed4 _Color;
			sampler2D _RampTex;
			float4 _RampTex_ST;
			fixed4 _Specular;
			float _Gloss;

			struct a2v {
				float4 vertex : POSITION;
				float3 normal : NORMAL;
				float4 texcoord : TEXCOORD0;
			};

			struct v2f {
				float4 pos : SV_POSITION;
				float3 worldNormal : TEXCOORD0;
				float3 worldPos : TEXCOORD1;
				float2 uv : TEXCOORD2;
			};

			v2f vert(a2v v) {
				v2f o;
				o.pos = UnityObjectToClipPos(v.vertex);
				o.worldNormal = UnityObjectToWorldNormal(v.normal); //把法线方向从模型空间转换到世界空间中
				o.worldPos = mul(unity_ObjectToWorld, v.vertex).xyz;//把顶点坐标从模型空间转换到世界空间中
				o.uv = TRANSFORM_TEX(v.texcoord, _RampTex);//把材质纹理映射到uv坐标上
				return o;
			}

			fixed4 frag(v2f i) : SV_Target {
				fixed3 worldNormal = normalize(i.worldNormal);
				fixed3 worldLightDir = normalize(UnityWorldSpaceLightDir(i.worldPos));
				fixed3 ambient = UNITY_LIGHTMODEL_AMBIENT.xyz;
                //使用halfLambert 构建一个一维纹理坐标,并用这个纹理坐标对渐变纹理_RampTex进行采样
                //因为_RampTex实际就是一个一维纹理,它在纵轴方向上颜色不变,因此u,v都采用了halfLambert
				fixed halfLambert  = 0.5 * dot(worldNormal, worldLightDir) + 0.5;
				fixed3 diffuseColor = tex2D(_RampTex, fixed2(halfLambert, halfLambert)).rgb * _Color.rgb;
				fixed3 diffuse = _LightColor0.rgb * diffuseColor;
				fixed3 viewDir = normalize(UnityWorldSpaceViewDir(i.worldPos));
				fixed3 halfDir = normalize(worldLightDir + viewDir);
				fixed3 specular = _LightColor0.rgb * _Specular.rgb * pow(max(0, dot(worldNormal, halfDir)), _Gloss);
				return fixed4(ambient + diffuse + specular, 1.0);
			}
			ENDCG
		}
	}
	FallBack "Specular"
}
遮罩纹理
遮罩允许我们可以保护某些区域,使他们免于某些修改。 使用遮罩纹理流程一般是:通过采样得到遮罩纹理的纹素值,然后使用其中某个通道的值来与某种表面属性进行相乘,这样,当该通道 值为 0 时,可以保护表面不收该属性的影响。使用遮罩纹理可以让美术人员可以更加精准的控制模型表面的各种性质。
1
2
3
4
5
6
7
8
9
10
11
12
13
14
15
16
17
18
19
20
21
22
23
24
25
26
27
28
29
30
31
32
33
34
35
36
37
38
39
40
41
42
43
44
45
46
47
48
49
50
51
52
53
54
55
56
57
58
59
60
61
62
63
64
65
66
67
68
69
70
71
72
73
74
75
76
77
78
79
80
81
82
83
84
85
86
87
88
89
90
91
92
93
94
Shader "Practice/MaskTex"
{
    Properties{
        _Color("Color Tint",Color)=(1,1,1,1)
        _MainTex("MainTex",2D)="white"{}
        _BumpMap("BumpMap",2D)="bump"{} //法线贴图
        _BumpScale("Bump Scale",float)=1
        //高光反射遮罩纹理
        _SpecularMask("Specular Mask",2D)="white" {}
        //遮罩影响程度
        _SpecularScale ("Specular Scale",float)=1.0
        //高光颜色
        _Specular("Specular",Color)=(1,1,1,1)
        //光泽度,光点大小
        _Gloss("Gloss",float)=1.0
    }
    SubShader{
        Pass{
            //前向渲染
            Tags {"LightModel" = "ForwardBase"}
            CGPROGRAM
            #pragma vertex vert
            #pragma fragment frag
            #include "Lighting.cginc"
            //对应Properties 类型和名字匹配的变量
            fixed4 _Color;
            sampler2D _MainTex;
            float4 _MainTex_ST;
            sampler2D _BumpMap;
            float4 _BumpMap_ST;
            float _BumpScale;
            sampler2D _SpecularMask;
            float4 _SpecularMask_ST;
            float _SpecularScale;
            fixed4 _Specular;
            float _Gloss;

            struct a2v
            {
                float4 vertex:POSITION;
                //法线向量是float3
                float3 normal:NORMAL;
                //切线由于需要w分量确定副切线方向,所以切线虽然是向量,但是也需要用float4
                float4 tangent:TANGENT;
                //模型第一组纹理坐标
                float4 texcoord:TEXCOORD0;
            };

            struct v2f
            {
                float4 uv:TEXCOORD0;
                //视角方向
                float3 viewDir:TEXCOORD1;
                //光照方向
                float3 lightDir:TEXCOORD2;
                //顶点
                float4 pos:SV_POSITION;
            };

            v2f vert(a2v v)
            {
                v2f o;
                o.pos = UnityObjectToClipPos(v.vertex);
                o.uv.xy= v.texcoord.xy*_MainTex_ST.xy+_MainTex_ST.zw;
                TANGENT_SPACE_ROTATION;
                //获取到光照方向,转换到切线坐标空间
                o.lightDir =mul(rotation,ObjSpaceLightDir(v.vertex)).xyz;
                //获取到视角方向,从模型空间转换到切线空间
                o.viewDir = mul(rotation,ObjSpaceViewDir(v.vertex)).xyz;
                return o;
            }

            fixed4 frag(v2f i):SV_TARGET
            {
                fixed3 tangentLightDir = normalize(i.lightDir);
                fixed3 tangentViewDir = normalize(i.viewDir);
                //像素反映射到法线
                fixed3 tangentNormal =UnpackNormal(tex2D(_BumpMap,i.uv));
                //
                tangentNormal.xy*=_BumpScale;
                tangentNormal.z = sqrt(1.0-saturate(dot(tangentNormal.xy,tangentNormal.xy)));
                fixed3 albedo =tex2D(_MainTex,i.uv).rgb*_Color.rgb;
                fixed3 ambient = UNITY_LIGHTMODEL_AMBIENT.xyz*albedo;
                fixed3 diffuse = _LightColor0.rgb*albedo*max(0,dot(tangentNormal,tangentLightDir));
                fixed3 halfDir = normalize(tangentLightDir+tangentViewDir);
                fixed specularMask = tex2D(_SpecularMask,i.uv).r*_SpecularScale;
                fixed3 specular = _LightColor0.rgb*_Specular.rgb*pow(max(0,dot(tangentNormal,halfDir)),_Gloss)*specularMask;
                return fixed4(ambient+diffuse+specular,1.0);
            }
            ENDCG
        }

    }
}
有遮罩 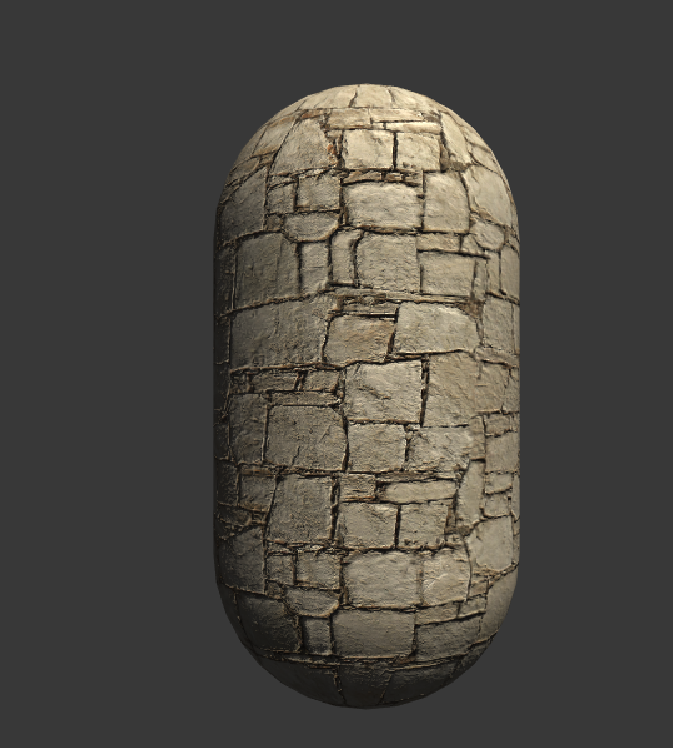
无高光遮罩
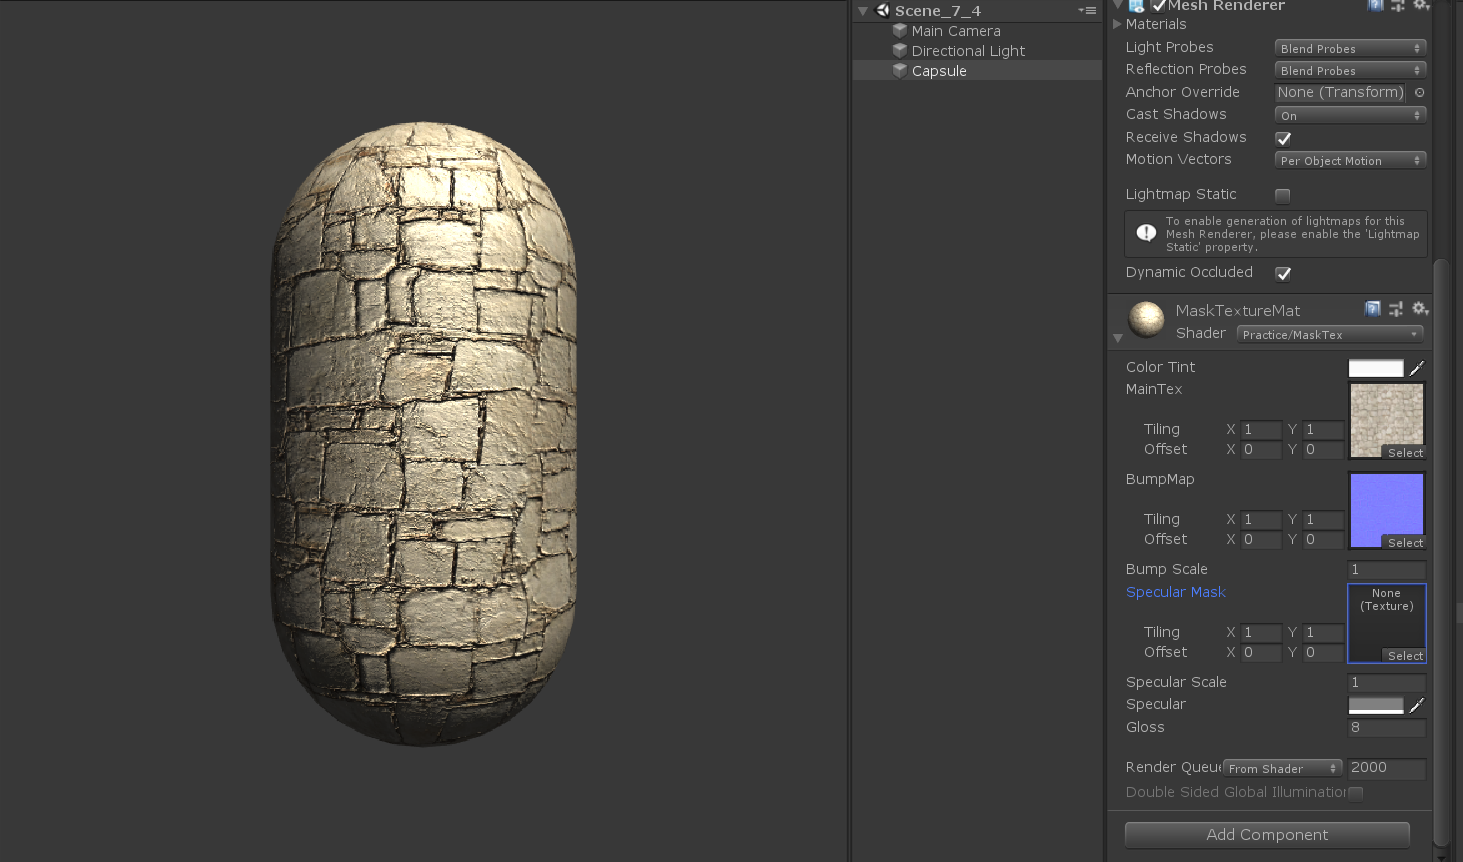
这里我们使用 r 分量计算掩码之,用得到的掩码值和_SpecularScale 相乘,r=0 的地方将不会受高光影响。
本文由作者按照 CC BY 4.0 进行授权